Querying - Manage Your Query Results
Manage Your Query Results
Use this page to select a query to view, enter an expression (e.g. to search for links using the SRS query language, see chapter chapter 8, "SRS Query Language" , of the SRS User Guide), choose a query for which you to find links, etc.
| Save a set of results | What data formats can I use? | |
| Combine two or more queries. | How do I specify location for saving data? |
See section "Saving your Results" in chapter 1, "SRS Quick Tour", of the SRS User Guide for how to use this page.
You can also save a complete project. To do this you need to use either the Project Manager page for temporary projects or the Project Manager page for permanent projects.
See also "Applying a View" in chapter 1, "SRS Quick Tour", of the SRS User Guide , "Saving your Results" in chapter 1, "SRS Quick Tour", of the SRS User Guide and "Finding Links from the Manage your Query Results Page" in chapter 4, "Links to Additional Data", of the SRS User Guide for examples of how to use this page.
More about the Manage your Query Results page.
Managing Query Results - Tasks
Save a Set of Results
- Select a query from the Manage your Query Results page and click

- On the Save Options page select the location to which the information is to be output, using the Output To: options: typically the Browser Window (HTML) or a File (Text).
- Select the format to be used for your output information, using the Save As: options. These include ASCII text/table, Generic XML format and Specific XML format.
- Complete the required information for your chosen format.
- Click
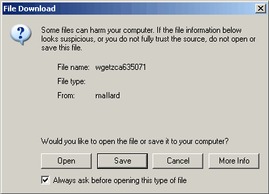
Figure 3.1 The File Download dialog box.Note: Dialog boxes shown throughout this document were generated in the Windows 2000 version of Internet Explorer 6. The dialog box you see may look different depending on your system and web browser.
- Click the
 button.
 - Choose a location for the file and a suitable name.
- Click the button to save the file.
Combine Two or More Queries
SRS allows you to combine queries so that you can select only entries that are in both sets, in one set but not the other, etc.
- Tick the check boxes beside the result sets you want to combine.
- Select an appropriate method of combining the result sets from the drop-down list in the Results Options box. You can combine using AND, OR or BUTNOT.
- Click

Managing your Query Results - Worked Examples
Saving Results
SRS allows you to save queries so you can use them later.
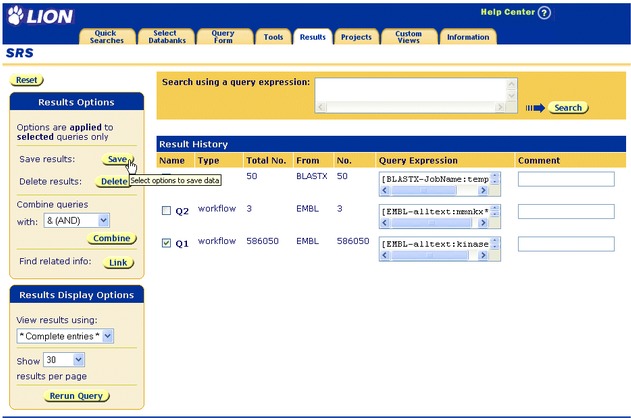
Figure 3.2 Select a query to save.
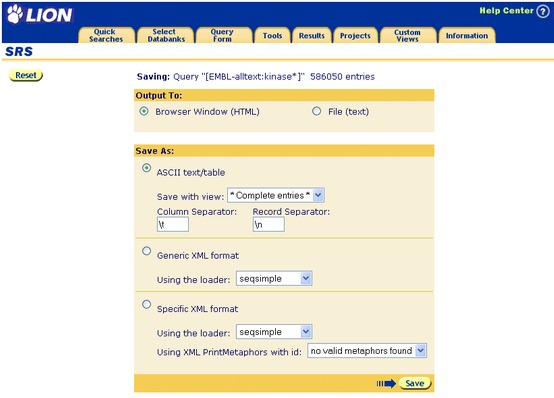
Figure 3.3 Set the save options on the Save Options page.
- Click the button. Your browser's File Download dialog box ( Figure 3.1 ) will be displayed.
Figure 3.4 The File Download dialog box.Note: Dialog boxes shown throughout this User Guide were generated in the Windows 2000 version of Internet Explorer 6. The dialog box you see may look different depending on your system and web browser.
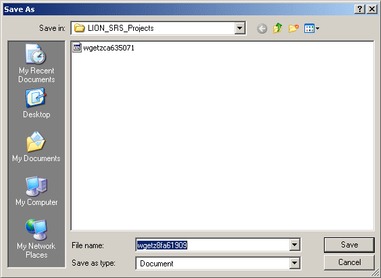
Figure 3.5 The Save As dialog box.
- Select a location for the file, choose a suitable name and then click the button to save the file.
Saving Results - FAQs
What Data Formats Can I Use?
You can save data to the screen or as a text file.
In either case you can choose the way data is formatted within the browser window/file using the Save As: options. Available options are:
Where Will My Data be Saved?
When you have chosen to save as a File (text) and chosen the formatting options, a File Download dialog will be displayed. Clicking will display the Save As dialog and this will allow you to choose a location to save your file.
Manage Your Query Results - Reference
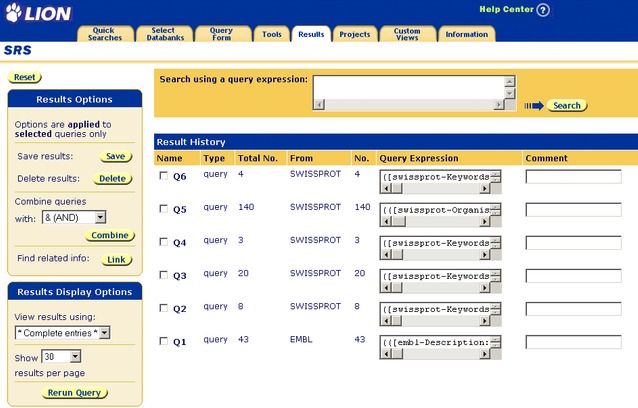
Figure 3.6 Manage Your Query Results page.
Getting to the Entry Page
This page can be reached at any time, by clicking the Results tab.
Using the Entry Page - Options Area
Expression
If you wish to search for entries that appear in the results of two specified queries, you can combine queries into an expression using various logical and linking operators.
Enter the query into the text box and click the  button. See also "Expression Queries" in chapter 3, "Querying with SRS", of the SRS User Guide
Save
The button takes you to the Save Options page. From there you can save the results to a file. If you wish to save an entire project see the Project Manager page for temporary projects or the Project Manager page for permanent projects.
Delete
You can delete a query that is no longer of interest. Select any such queries (by ticking the check boxes beside them) and press the  button. You can also delete an entire project, see the Project Manager page for permanent projects.
Link
The  button takes you to the Link page, from where you can search for links between your results and other databanks.
View
You can use any of the predefined views to display the results. Below the  button there is a drop-down list containing the currently available views. When you have chosen a view and selected a query or group of queries, press the button to update the display.
Combine
You can combine the results of two or more queries. Tick the check boxes beside the queries you wish to combine, choose the appropriate logical operator (AND, OR, BUTNOT) from the drop-down list below the button and click the button. This creates a new query containing the results of your combined queries.
Number of Entries to Display per Page
This drop-down list allows you to specify the maximum number of entries to be listed per page of results. When the number of entries is greater than this value, entries will be spread over two or more pages. Press the button to refresh the page using the new number of entries.
Using the Entry Page - Data Area
Successful Queries
The queries that have been made during the current project are listed in this table with the most recent query at the top.
The information for each query result is divided into categories. These are described below.
- Name
- This indicates the name assigned to each query, e.g., Q1.
- Type
- This lists the type of query that was performed, e.g. query.
- N Total
- This is the total number of entries returned by the query.
- From Databank
- This is a list of the databanks that returned matching entries. Note that when virtual databanks, containing more than one databank have been searched, the From Databank list contains the names of the original databanks that comprise the virtual databank.
- N
- This gives the number of entries returned from each databank.
- Query Expression
- This box contains the query language string that was used by the system to make the query. See chapter 8, "SRS Query Language" , of the SRS User Guide, for more information.
- Comment
- You can add your own comments about each query here.
Other Information
