Analysis Tools - Launching
Launching Analysis Tools
If this page has been accessed without selecting a query, it is necessary to enter the appropriate sequence data.
See also section "Using Analysis Tools" in chapter 1, "SRS Quick Tour", of the SRS User Guide and chapter 6, "Analysis Tools" , of the SRS User Guide for examples of this page in use.
More about the Launch page.
Launch Page - Reference
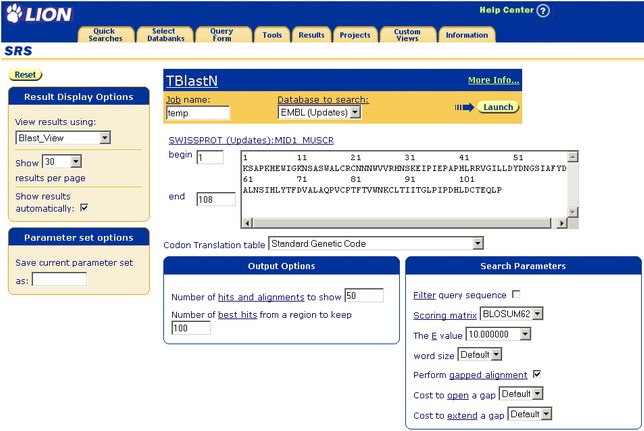
Figure 6.1 Typical Launch page for an interactive analysis tool.
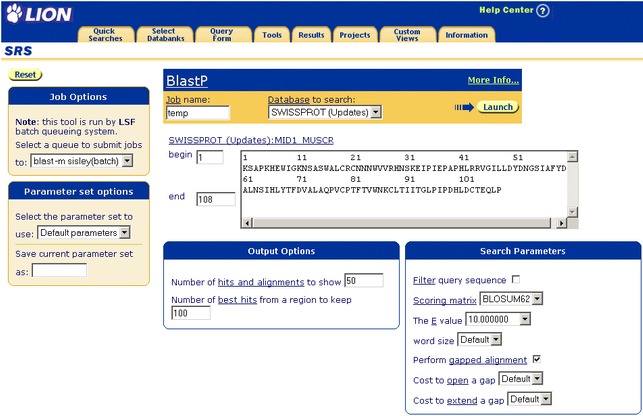
Figure 6.2 Typical Launch page for a batch queued analysis tool.
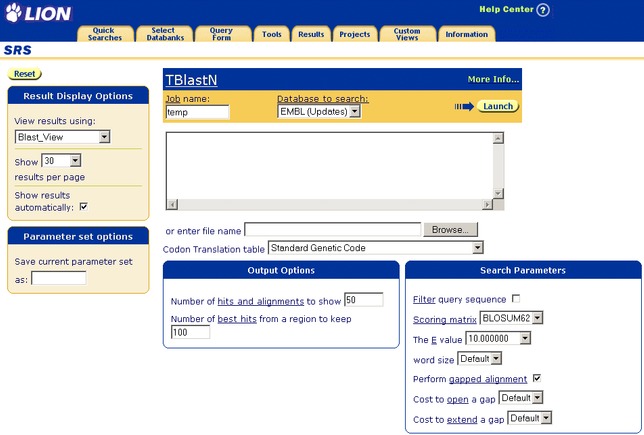
Figure 6.3 Typical Launch page for an analysis tool selected without a query.
Getting to the Launch Page
This page can be reached by clicking the  button, typically from the Query Result page or by clicking on the launch hyperlink on the Tool Select page. The interactive or batch versions of this page will be chosen automatically according to the setup of the system being used.
Data Area
Select View to Display Results
This drop-down list is used to select a view which will be used to display the results. This option will not be available when the analysis tool is to be run via a batch queue. (See section Job Status page for how to set a view using batch queued analysis tools.)
Show ... results per page
This option allows you to specify the maximum number of resulting entries to be listed per page. This option will not be available when the analysis tool is to be run via a batch queue.
Show Results Automatically
If this box is unticked then the analysis tool processes your request but does not display the results until you request them. This option will not be available when the analysis tool is to be run via a batch queue.
Select a Predefined Parameter-Set to Use
You can use any predefined set of parameters; choose from the drop-down list. Alternatively you can create your own parameter-set.
Parameter Set Options
Once you have defined a set of parameters for an analysis tool, you can give the set a name, using this text box. The changes will be saved when the analysis tool is launched and your new parameter-set will be added to the drop-down list for later use within the project. If you do not give the parameter-set a name, then the parameters will be used, but not saved.
Options Area
Tool Name
The name of the analysis tool to be launched is written at the top left of the Launch page. This name is also a hyperlink to a page (Tool Information page) describing the chosen analysis tool and its parameters.
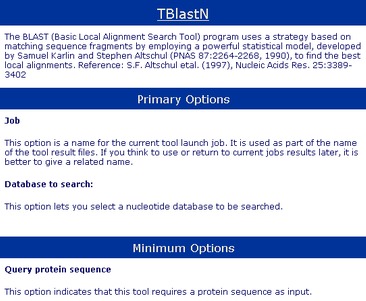
Figure 6.4 Tool Information page.
Name of Job
This is the name that SRS gives to your job. The default name is "temp", however, you can change the name to something more appropriate if you intend to reuse the information later.
Database to Search
This drop-down list lists the databanks on which this analysis tool can operate.
Launch
The button launches the analysis tool using the settings displayed on the Launch page.
Data Area
The contents of this area will vary according to the analysis tool to be run. The meanings of tool-specific parameters are described on the Tool Information page which can be reached by clicking on the analysis tool name hyperlink. If you need further information on a specific option, please contact your SRS Administrator.
The Launch page also includes text boxes for the following information:
Entry to Analyze
The name of the entry or entries (where applicable) that are to be included in the analysis.
Begin / End, Sequence to Analyze
These text boxes contain the values for the start and stop positions within the sequence that should be used for the analysis of each entry, and the sequence itself.
Other Information
