Creating Views
Creating Views from the Query Forms
Creating Views from the Standard Query Form
The bottom half of the Standard Query Form has a section entitled Create a view which allows you to specify the datafields that are to be used to display the results of your query (see Figure 5.12 ). You can also choose whether to display the results using a table or a list view, and the sequence format that is used.
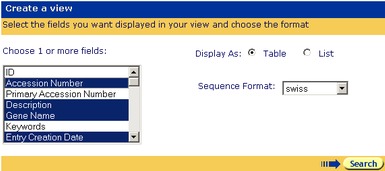
Figure 5.12 Specifying the datafields to be used to display results on the Standard Query Form.To design your own view:
- Select the datafields you want to display from the Choose 1 or more fields: list (see Figure 5.12 ).
- Choose whether you wish to display the results using a table or a list view, using the option buttons.

Figure 5.13 Table and list view option buttons.
- Choose the sequence format using the drop-down list.
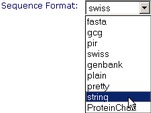
Figure 5.14 Sequence format drop-down list.
- Complete the query as normal. The results will be displayed on the Query Result page as specified.
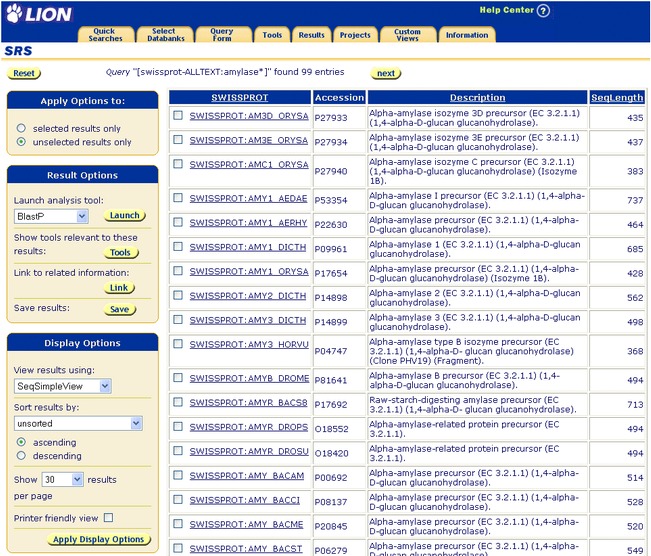
Figure 5.15 Query Result page, showing a table view.
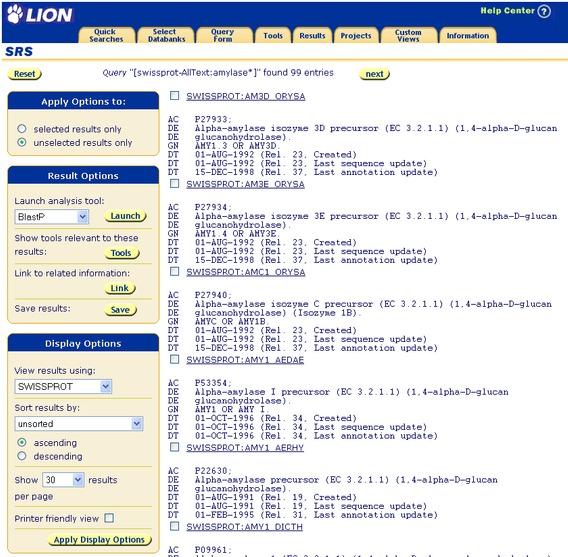
Figure 5.16 Query Result page, showing a list view.
Creating Views from the Extended Query Form
On the right of the Data Area is a column entitled Create a view (see Figure 5.17 ). This contains check boxes (one for each datafield) which are used to tell SRS to include a datafield in the results. You do not have to enter a search term in a field to have it included in the results. The drop-down list in the Result Display Options box allows you to choose whether to create a table or list view.
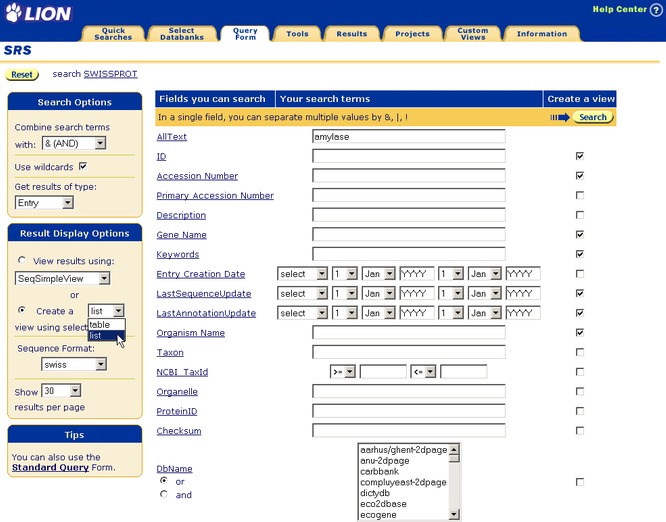
Figure 5.17 Select the fields to include on the Extended Query Form.To create a view from the Extended Query Form:
- Enter your search term(s) as usual. See chapter 3, "Querying with SRS", , for details.
- Use the drop-down list to choose whether the view will display as a table or list view.
- Tick the check box to the right of any fields that you want to display in the results.
- Continue with your query as usual.
Creating Views using the View Manager Pages
Note:There are two View Manager pages, referred to here as View Manager page 1 and View Manager page 2.
Click the Views tab to go to the View Manager pages. You can control the following elements of any views that you create:
- The name of the view (View Manager page 1).
- Whether the view displays as a table or list format (View Manager page 1).
- Whether the fields show on View Manager page 2 will include all available fields, or just the common ones (View Manager page 1).
- The list of databanks for which the view is defined (and for which the view is therefore available). These are referred to as "root databanks" (View Manager page 1).
- The list of databanks that may have a link with the entries (View Manager page 1).
- The list of fields from the root databanks and the linked databanks that should be displayed (View Manager page 2).
- The format of some fields such as Sequences (View Manager page 2).
To Create a View
- Click on the Custom Views tab. This will take you to the View Manager page 1.
- Name the view by entering a suitable name in the View name text box.
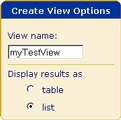
Figure 5.18 Create View Options box, showing naming of a view and the table and list view options.Note:It is better not to include spaces and other special characters in names as some systems do not handle them properly. Use an underscore, or start new words with a capital letter instead.
- Choose whether the new view will be displayed using a table or list format.
- Choose whether you wish to choose from all available fields in the selected databanks, or just the common ones.

Figure 5.19 Selecting fields.
- Select the databanks for which the view will be available, using the left-hand column of databanks, headed Databanks to define a view for. These are the root databanks for the view.
- Select the databanks to which you wish to link, using the right-hand column of databanks, headed Databanks to be linked to.
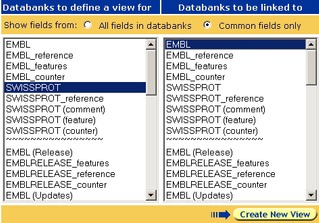
Figure 5.20 Selected databanks.
- Click on the
 button (see Figure 5.21 ).
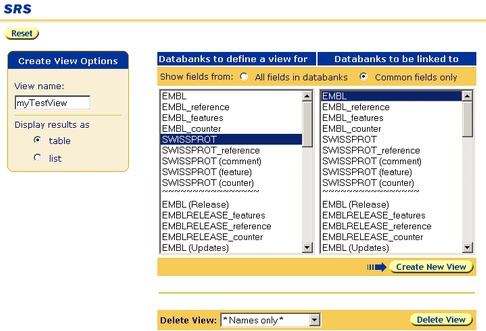
Figure 5.21 View Manager page 1.SRS will display the View Manager page 2 on which you can select the specific fields for your view. By default (it can be changed on View Manager page 1) the top box contains the fields which are common to all of the root databanks selected on the previous page. There are additional boxes below this for each linked databank you chose. Using these check boxes, select the fields that you would like to see in your view.
- Select the fields you would like to display in your view by ticking the check boxes beside the relevant fields.
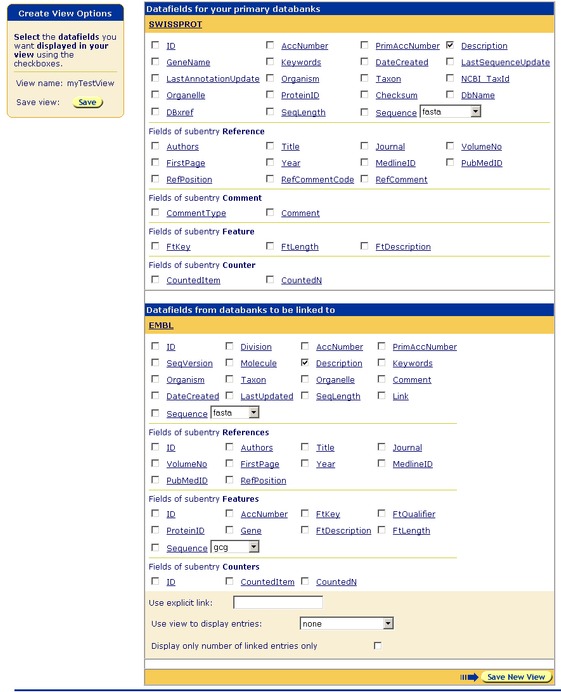
Figure 5.22 Select the datafields to be included in your view.Note:Each field name is a hypertext link to its Field Information page (see section on the "Information Pages - Field Information" in the Online Help ). So if you want to know more about a particular field, use these hypertext links to find out.
- Click on the
 button.
SRS includes a number of predefined views that you can use to change the way in which your results are displayed. In addition, you can create your own views. During this chapter you will learn:
- About the predefined views available in SRS.
- How to work with views.
- How to create and use your own views.
